Suggested Workouts

On this page you will find a few ideas for using Sight Reading Tutor - some suggestions for methods of using the content of the app, and some workouts that will really help your sight reading to improve.
Remember though that these are only suggestions. You can of course use the app in any way you find suitable. And the more you use it, the better your sight reading will become!
How to use the app...
The use of a timer
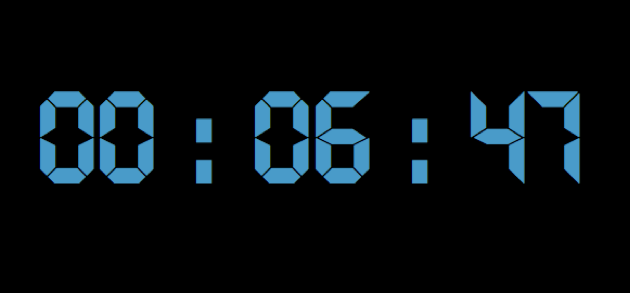
A useful addition to your use of Sight Reading Tutor would be a countdown timer, such as a
kitchen timer.
Although there is a timer feature on your phone or iPad, you wouldn’t easily be able to glance at it while doing a workout, as you’d have to temporarily exit Sight Reading Tutor to view the timer. This is not only a bit of a faff, it also interrupts your thought processes and takes you “out of the zone”. Sight reading - especially practising sight reading - is a difficult task requiring a great deal of mental activity and is best not interrupted.
However, we have found that a visible timer is a useful tool in the workouts that we have done, as it has a psychological effect of adding to the “rise to the challenge” mentality that is so helpful in achieving results.
If you are using the app on your iPad, then of course you could then use the timer on your phone while doing a workout. But to be able to see the timer at all times, you will need to temporarily switch off the “Auto-lock” feature of your phone. To do this on an iPhone, perform the following actions:
-
1.Tap “Settings”.
-
2.Tap “Display and Brightness”.
-
3.Tap “Auto-Lock”.
-
4.Tap “Never” (or another selection if you prefer, but make sure the time you select is greater than your planned workout).
-
5.Press the “Home” button to return to the main screen.
You can now select the timer function which is in the “Clock” app on your phone, and set the timer to whatever length of workout you are planning on doing. The screen will not now dim or go black during your workout, so you can keep an eye on how long you have left as you perform your chosen exercises.
After your workout, don’t forget to reset the Auto-lock feature on your phone, as leaving the screen illuminated permanently will drain your phone’s battery power.
(NB The above instructions apply to iPhones running iOS 10.3.x. These instructions might not apply to your iPhone if you’re running a different version of Apple’s iPhone operating system. If you don’t have an iPhone, then of course you should take a look at your phone’s instructions as to how to turn off the auto-lock feature.)
With all that having been said, you could of course just use a purpose-made timer like a kitchen timer or even an hourglass! But whatever method you use, setting yourself challenging time targets will undoubtedly speed up the process of turning you into a skilled and able sight-reader.
The Workouts
The first thing to say about the workouts you can set yourself with this app is... you can do whatever suits you! There are of course no restrictions on how the app can be used; you can do just the easy stuff, just the difficult stuff, a mixture of everything or just the areas that you yourself feel you need to work on. (For example, you may be good at following and playing melodies but find it difficult to play note clusters. In this case, you might want to focus just on “Structured Chords” and “Random Chords”.) That’s fine; that’s great. Use the app in any way that suits you.
However, if you would like some pointers, along with some comments and suggestions as to the validity of using the app in particular ways, then here we go...!
-
1.Single Note Shout-out
-
The method for this workout is fairly straightforward... simply select “Bass Clef Single Notes” and/or “Treble Clef Single Notes” in the Settings page, and then say the notes out loud as they appear in front of you. Don’t even bother trying to play them yet. This workout is meant just to speed up your recognition, and is particularly good for beginners (you may wish to download and print off the reference charts from this website if you are an absolute beginner). Say the names of the notes as quickly as you can, and avoid looking at the reference charts if possible.
-
-
The idea of this workout is that your memory for the appearance of note pitches begins to develop, and you mentally associate the names of notes with their positions on the staff. Remember that no two notes look the same, and although the distinctions between them are slight and subtle, they are real and they are there. You have to train yourself to spot and recognise these subtle distinctions, and eventually these slight differences will lose their “slightness” and become strikingly obvious. It takes time and repetition though.
-
-
If you have the strength of mind, try doing one continuous hour on this workout. It’ll be tough, especially for a beginner, but you’ll already have made amazing progress at the end of even just one hour. If you can’t stomach an hour, try half an hour or even less, but remember that you do have to take yourself beyond the point of a mere “warm-up”. You have to reach the point where you are feeling slightly (or even hugely!) mentally taxed. Repeat this workout as often as you feel you need until you’ve achieved a satisfactory speed of note recognition.
-
2.Single Note Play
-
This workout is a natural “follow-on” from the one above, making it suitable for beginners or early-stage developers, and as the name suggests it requires you to play the notes as you see them. Again, for this workout we suggest that you use only single notes, simply as a method of speeding up your recognition of notes on the staff but then also beginning to associate those notes with particular sounds and particular positions on the piano. (NB using this app will not give you perfect pitch, but it will help your brain associate the appearance and position of notes on the staff with approximate pitched sounds.)
-
-
An hour on this would be a good target time, but see the above workout (“Single Note Shout Out”) for some comments on reducing the length of time you do your workouts for. It really is important to remember that you have to push yourself into the lengths of time where the exercise becomes a bit taxing and a mild (or even tough) strain.
-
-
-
-
3.Interval Recognition Shout Out
-
This is a good workout in terms of both sight reading and music theory. What you do is switch on (on the “Settings” page) a combination of the intervals selections. The combination can be anything you like, but you might want to start on, say “Fourths” together with “Fifths”. Then you shout out not the notes, but the intervals which appear in front of you. So you say out loud not “G and C”, but “fourth”. Or not “E and B”, but “fifth”. This will improve your recognition of the different intervals, which is of huge importance not only for sight reading but for (at least on the piano) fingering as well.
-
-
Again, an hour on this at a time would be a good time target, but you may want to vary the combinations of intervals that you switch on in the “Settings” page. Perhaps you could do fifteen minutes on “Fourths” together with “Fifths”, then another fifteen minutes on “Sevenths” together with “Octaves”, a further fifteen on “Thirds” together with “Fourths” and then finally for this workout fifteen minutes with all intervals (Thirds, Fourths, Fifths, Sixths, Sevenths and Octaves) switched on. This can be a bit of a brain-strain, but that is a good thing. You do need to stretch yourself in order to make improvements.
-
-
Of course, the selection of intervals you choose to switch on at any one time for this workout is entirely up to you. You could do “Thirds” together with “Octaves”, but those two intervals look so vastly different it wouldn’t be much of a challenge to recognise which is which. The closer the intervals are, the more difficult they are to discern; we think possibly the hardest combination is “Sevenths” together with “Octaves”.
-
-
As you improve with this workout, you could try combinations of three or more intervals, finally culminating (as mentioned above) in ALL the intervals switched on at once.
-
-
-
-
4.Interval Recognition Play
-
-
As you may already have guessed, this workout is the same as “Interval Recognition Shout Out”, except that you play the notes you see, rather than calling out the intervals. It’s recommended that you do the shout-out workout first and then do this one, for the simple reason that you would then (hopefully) be recognising the shape of the note combinations on the staff, rather than working out two individual notes. In other words, your brain will say to itself, “Aha! A fifth on ‘F’!” rather than “That note is an ‘F’ and that one is a... erm...’C’...?” So you’ll be recognising the appearances of intervals and not simply struggling to identify individual notes.
-
-
For the timing suggestions, we’d recommend the same ideas as for workout number 3, above.
-
5.Dyad and Melodic Interval Play
-
This workout is really starting to develop your recognition and speed. Switch on “Melodic Intervals” and “Dyads” together... and go for it! You might want to set yourself a rule that the melodic intervals (those written as quavers) should be played with one hand (left hand if it’s bass clef, right hand if it’s treble) and the dyads (those combinations written as separate crotchets) should be played with one note in each hand simultaneously. But whatever method you adopt for the execution of the musical instructions that appear in front of you, the essence of the whole thing is... speed! Go as fast as you can, and try to look at your hands as little as possible. (As an aside here...it will be pretty much impossible to refrain from looking at your hands completely; trying to do so will slow you down as you feel for the notes on the piano. And of course there is nothing inherently wrong with looking at your hands as you play the piano. It’s just that for this workout, you should try to do so as little as possible. If you can get some or even all of the flashcards correct without looking at your hands, then do. Only look at your hands if absolutely necessary.)
-
As for the timing on this workout, the more you do then the better and quicker you will get. Maybe try an initial timing period of 45 minutes...?
-
-
6. Structured Chord Shout Out
-
Now this is one of our favourite workouts. It’s great. What you do is head over to the “Settings” page, and switch on “Structured Chords”. Then as you tap the screen and the images appear in front of you, you have to say what the chord is without playing it! You just have to shout out “F minor” or “B-flat major” or whatever the chord is. No playing! *
-
This workout sharpens up your chord recognition rapidly. It helps you see relationships between notes and the structures of what chords look like when written on the staff. So rather than identifying individual notes as you play, you’ll be seeing and recognising shapes. This speeds up your sight reading and your playing enormously, and is a very important element in the reading of music. You will no longer see awkward clusters of notes; instead you’ll recognise shapes.
-
But why no playing? Why only shouting out? Well, if you were to play the chord, you’d be able to tell from its sound whether it’s major or minor, and so that will be something of a giveaway. It’s important that you develop the ability to recognise the chord before you play it. And don’t worry; this skill will develop very quickly and become, after a while, almost instantaneous. It won’t hold up your piano playing speed. In fact, it will increase it!
-
All twenty four major and minor chords are included in this categories, all of them in a variety of inversions.
-
-
As regards a time target on this workout... do as long as you can! One hour will pay great dividends, but it may leave you feeling pretty exhausted. Just remember that the more you do it the better you will become!
-
-
This is a tough, very useful, and very enjoyable, workout. Have fun!
-
*If you need to check your answers, then of course you can play the chords that appear in front of you. It’s just that from a learning point of view, it’s best to play the chords after you have named them.
-
-
7.Key Signatures Shout Out
-
This one has to be a shout out because... there’s nothing to play!
-
This is a very simple workout and shouldn’t need too many repetitions before the knowledge and skill are complete and can be said to be “bagged”. In other words, the box will be ticked before long!
-
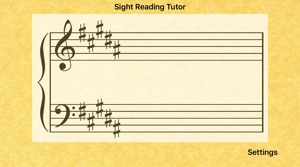
It’s simply to get you to recognise the different key signatures. Switch on “Key Signatures” and off you go: simply say the name of the key signauture as it appears in front of you. There are fifteen flashcards in this category; going from one sharp (G major) up to seven sharps (C-sharp major) and from one flat (F major) up to seven flats (C-flat major)... plus of course, no flats or sharps at all (C major).
-
There are downloadable resources on this website to assist you with the recognition of key signatures.
-
If you’re looking for a time target on this workout, it’s really just a question of doing it until you’re convinced you know and can recognise all the key signatures. Do as long as you need. Perhaps it’ll only take you half an hour!
-
-
-
-
8.Key Signatures Scale Play
-
We delve deep into written music with this workout, and it may prove to be one of the most valuable workouts you can do to improve your sight reading.
-
This workout is really rooted rather profoundly in music theory, and in addition to being useful those who are “self-teaching”, it may be very useful for teachers who are trying to establish key signatures in the minds of their students.
-
-
As you may (or may not) know... the musical staff does not represent adjacent notes on the piano. As notes on the staff climb or descend from line to space and space to line, they move to adjacent notes in the scale, not adjacent notes on the piano. There is no “chromatic scale” key signature - to write out a chromatic scale on the staff would always require accidentals.
-
-
So which scale is represented by the staff? Well, the answer is... the staff can represent any major (or minor*) scale. The scale represented is shown to you by the key signature (which you now know because you’ve done workout number 7!); in other words, the five lines (plus ledger lines) of the musical staff are a “moveable feast” and will show you any of the seventeen (yes, it is seventeen and not twelve!) major scales.
-
-
So what do we do for the workout?
-
-
Simple. Switch on “Key Signatures” and tap away on the screen. But instead of shouting out the key of the key signatures that appear, you have to play the scale of the key that is indicated. In other words... see one sharp? Play the scale of G major. See three flats? Play the scale of E-flat major. See six sharps? Play the scale of F-sharp major. And so on.
-
-
The benefits of this workout are numerous. Firstly, it helps your brain associate the appearance of a key signature with a particular scale, and this is vital for sight reading. If you do this workout often enough, the appearance of a key signature at the beginning of a staff will cause your fingers to expect a certain shape to be felt underneath them - the shape of the major scale that the key signature indicates.
-
-
Secondly, it gives you major (no pun intended!) cause to practise your scales. This is no bad thing; practising scales improves your fingering, your coordination and your musical understanding. The diatonic scale is the foundation of our musical system and familiarity with it in all its variations is hardly going to be a drawback! Get to it!
-
-
Thirdly, it gives you the “Aha!” moment. Over a period of time of doing this workout, you will begin to see the system of keys and key signatures crystallise in your mind; you will understand why we do this and how it works. It’s a deep and charmed feeling, and once you’ve got it your understanding of music, and your ability to read it, will improve massively.
-
-
So how long for this workout? Well, one hour would work wonders! And keep doing it too - it will give you such a foundation in your sight reading and music theory that you’ll find it invaluable!
-
-
N.B. If you need assistance with the major scales, and/or key signatures, there are downloadable resources available on this website.
-
9. Time Signatures Shout Out
-
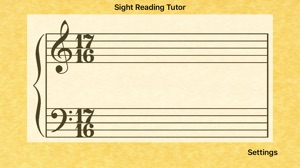
Again, similar to workout number 7 above, this is a “shout out only” workout. It’s to get you to recognise time signatures.
-
And if you’re not sure what the numbers in a time signature do actually mean, then once again you’ll find downloadable resources here to help you.
-
Once you know the system for identifying time signatures and what the numbers mean, this workout shouldn’t take long at all. Maybe just ten minutes.
-
-
-
-
It’s worth noting that we don’t normally leave the last two categories (Time Signatures and Key Signatures) switched on during our sight-reading workouts. These two categories are really more aimed at establishing music theory rather than improving recognition of notes. And if you’re giving yourself a tough workout on, say, “Random Chords” and “Complex Phrases”, you might find the sudden appearance of a key signature with no notes on the staves a bit of an interruption.
-
-
Do remember though... these workouts are only suggestions. Feel free to use the app in any way you find suitable. If you come up with a good workout of your own, then please do let us know. We’ll try it out and add it to this list!
-
Enjoy your workouts and watch the results come in!